Import a CSV file
Importing your transactions via a CSV file is the fastest way to get started with Piastro or to update your data without automatic bank sync.
Good to know
Each bank exports CSV files differently. Piastro is designed to handle most formats — even imperfect ones.Import process
The process takes 4 simple steps.
-
Choose the file and the account
- Select the CSV file to import from your computer.
- Choose the account where the transactions should be added.
-
Map the columns
From the preview, map your CSV columns to the fields Piastro expects (date, amount, description…).
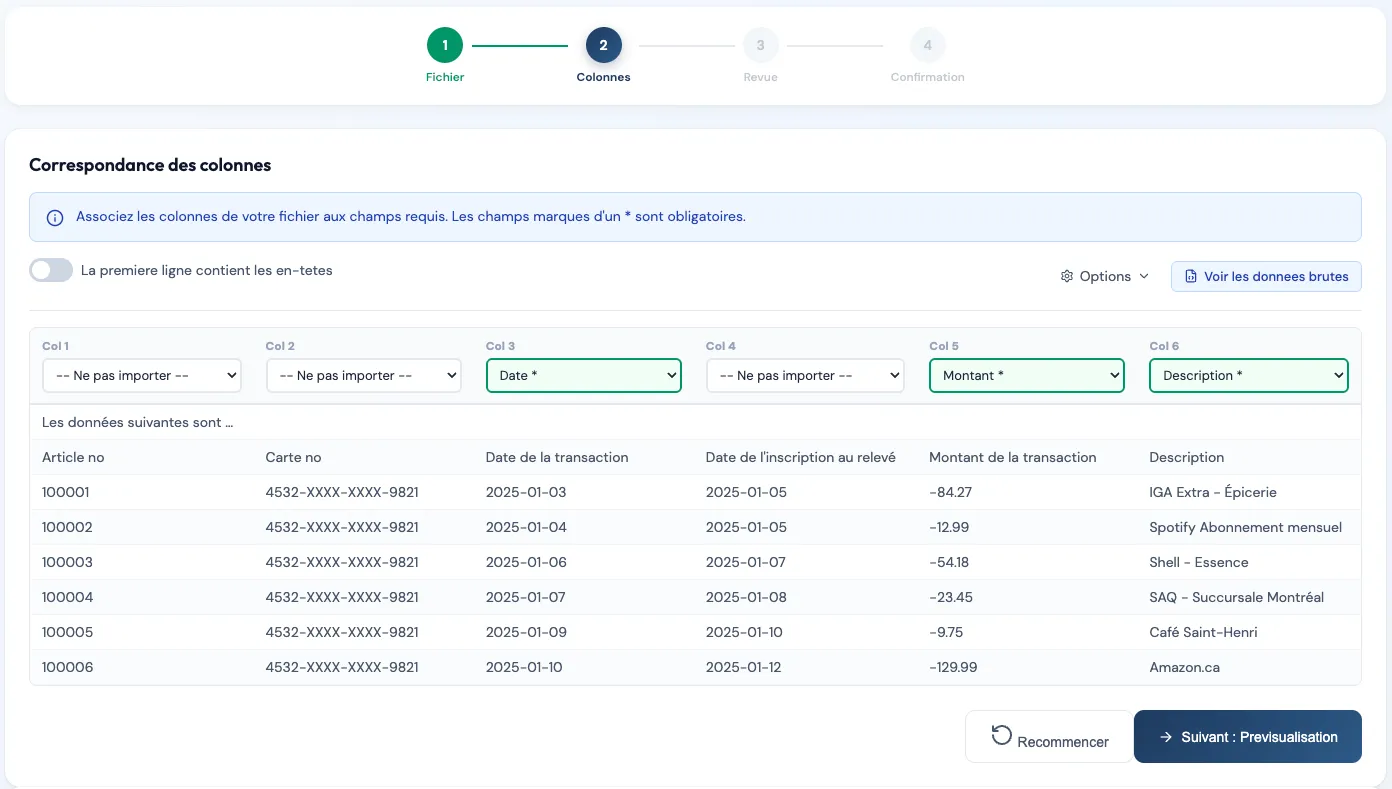 CSV column mapping
This step helps you confirm the data is interpreted correctly before importing.
-
Review and adjust transactions
Before the final import, you can:
- Flip the sign of amounts if needed.
- Exclude some transactions.
- Confirm or edit the assigned category.
To learn more about auto-categorization, see: Auto-categorization.
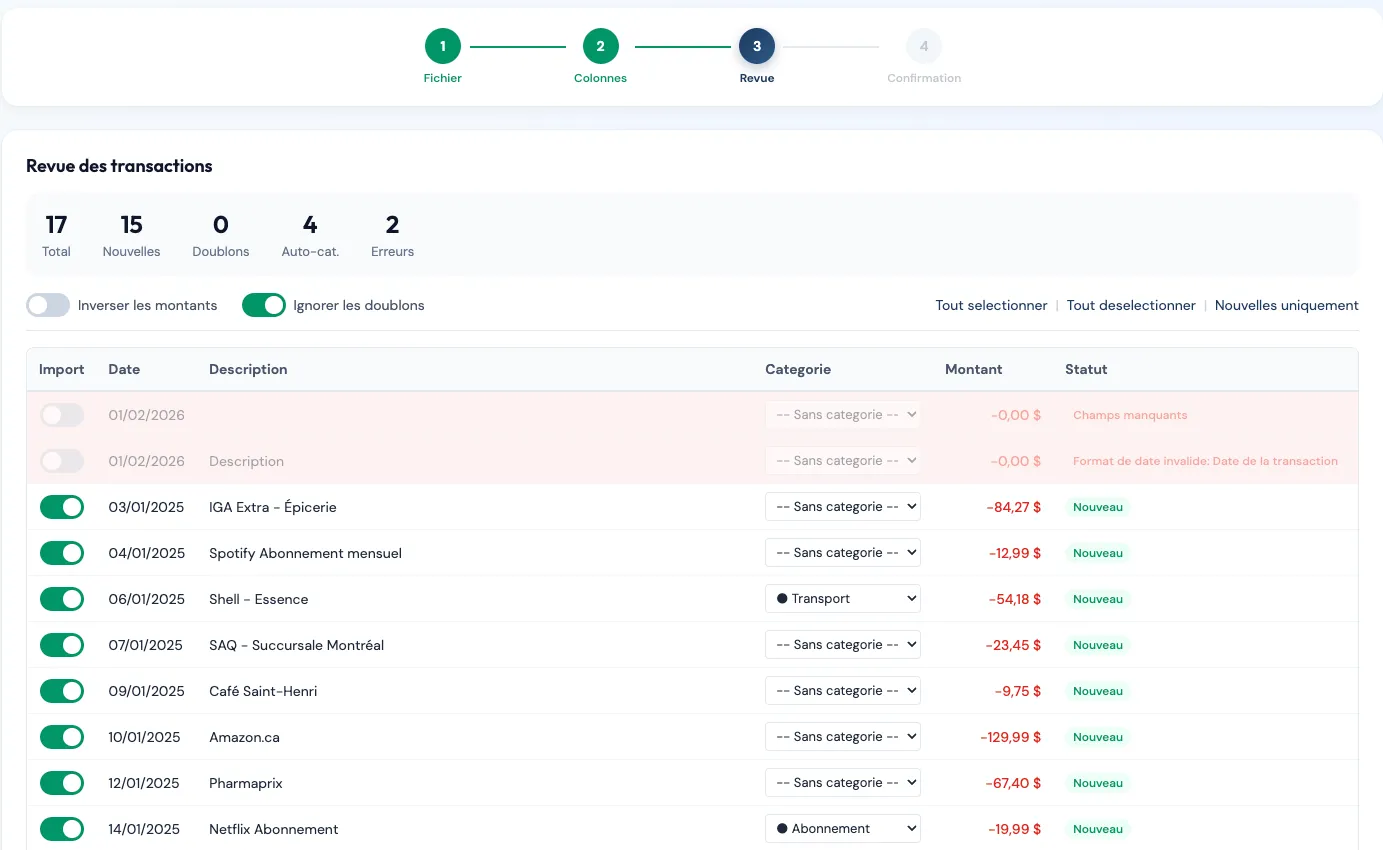 Reviewing CSV transactions
 -
Import and analyze
Once everything looks good:
- Start the import.
- Find your data instantly in Piastro.
- Start analyzing your spending and budget.
Check before importing
- Make sure the date, amount, and description are detected correctly.
- Confirm that amounts look consistent.
- Save an import template name if you often reuse the same format.
Undo an import
If something is wrong, you can undo an import from the history.Common issues
The CSV won’t import
- Make sure the file is a .csv (not .xlsx or .pdf).
- Try opening it in Excel/Numbers to validate its contents.
Some transactions are missing
- Check the date range selected during export.
- Make sure no filters were enabled on your bank side.
Need help?
Need help with a specific bank? Browse our guides, for example: Export a CSV from Desjardins (AccèsD) — support@piastro.ca.